

2022-04-12
What is Conentful? Explanation of introduction and setup procedures
Table of contents
What is Contentful?
Contentful is an API-based CMS called "Headless CMS".
The following is a brief description of the differences from a conventional CMS and the fee structure.
Differences between traditional CMS and Headless CMS
First of all, CMS stands for "Contents Management System".
The biggest advantage of using a CMS is that you can manage blogs and other content without having to know HTML or CSS to create a website.
More specifically, this service is for creating, editing, and deleting content (such as blog posts).
- Traditional CMS (Wordpress)
-
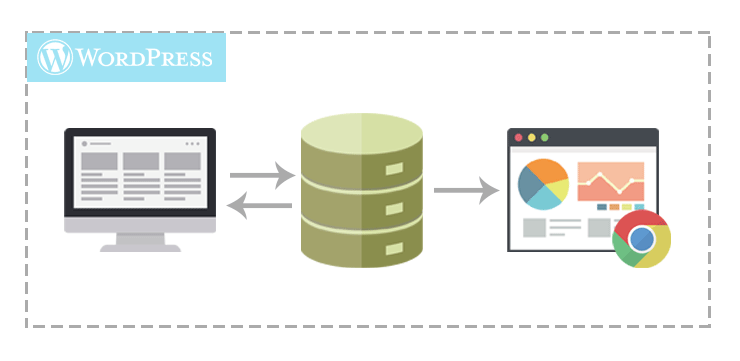
WordPress is the first and most popular traditional CMS, and it would not be an exaggeration to say that WordPress is the first candidate for starting your own blog.
WordPress" is characterized by the following points
- It integrates not only the management screen, which is the original feature of CMS, but also the function to display the contents managed in the management screen (back end) on the web page (front end) in one system.
- There are many free and paid templates, and you can run a blog or other website without any knowledge of HTML/CSS as long as you keep them as they are.
- If you have knowledge of PHP and HTML/CSS, you can freely customize your blog.
- Headless CMS(Contentful)
-
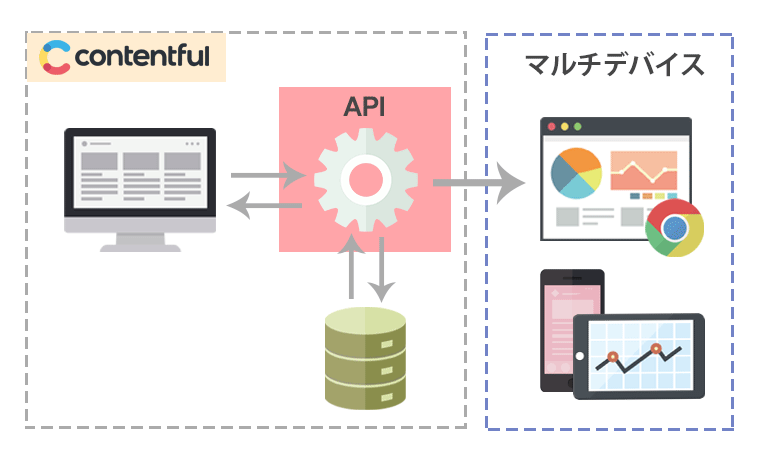
"Headless CMS" is often referred to as an "API-based CMS.
Because content can be managed and retrieved on an API basis, and there are no restrictions on the display (front-end) side, managed content can be retrieved and displayed either from a web application (website) or from a mobile application.
This means that the front end (display side) can be completely separated from the back end (management side).One of the "Headless CMS" services, Contentful, features the following
- As a CMS, it has an administration screen, but no functionality for displaying, and API-based content information can be retrieved.
- The administration screen and the display area are separated, allowing the user to concentrate on the content.
- API-based content can be retrieved, making it compatible with multiple devices (smartphone apps and websites).


WordPress vs. Contentful
Compare the advantages and disadvantages of WordPress (traditional CMS) and Contentful (Headless CMS).
Contentful's fee structure
Now that we have briefly described what Contentful is, we will explain how far you can go for free and the plans that Contentful offers.
Contentful offers two plans, "MICRO SPACE" and "LARGE SPACE," and the free plan will be assigned one "MICRO SPACE".
In this article, we will skip the explanation of "LARGE SPACE" since this will be an explanation of how far it can be used for free.
To learn more, please click here.
- What you can do with one free "MICRO SPACE" plan
-
- One role (user privileges)
- 5000 records
- 24 content types
- Two environments (production, development, etc.)
- Two locales (Japanese, English, and other multiple languages)
- SDKs in 8 languages(JavaScript, PHP, Android, iOS, Java, Python, Ruby, .NET)
- 10 users
- API calls (2 million/month)
- Asset bandwidth (0.75 TB/month)
5000 records is not just 5000 articles, it is calculated to consume 5 records if you are using 4 images per article, so if you have 4 images per article, you can post 1000 articles.
In addition, API calls are not likely to be exceeded in the beginning, so the free plan should be sufficient for your operation!
Contentful usage
Now, I would like to go through the process of uploading one article while actually touching Contentful.
Registration
Register here. Once the registration process is complete, you will see a screen similar to the one below, press the button on the left. (Either one is OK)
Registration is now complete. The following screen will be your management screen!
Create Space (Project)
A space is a project unit area, and if you run multiple blogs, for example, you can imagine increasing the number of spaces.
You may have a sample space by default, but we will create a new space this time.
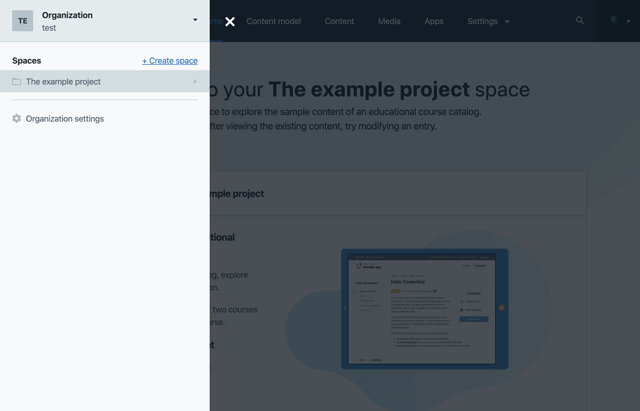
Click on the "hamburger button in the upper left corner"-->"Create space" in the slide menu, enter a space name in the modal, and create the space.
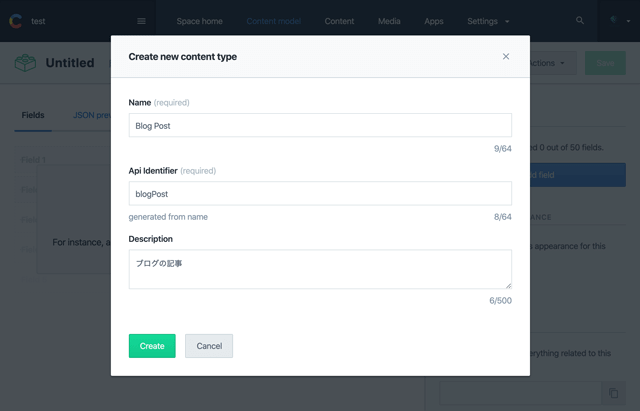
Create ContentModel (category)
The content model is a function for bundling content to be created on the space, a kind of category, so to speak.
You can create models for articles, tags, categories, etc., and manage them by referencing each model.
In this article, we will simply create a content model for articles.
Click "Content model" → "Add content type" in the upper navigation of the administration screen to display a modal and enter each item as shown below.
Add Field (article item)
Fields are like input form templates that are set for each content model.
Since we have created a content model for blog posts, we will create fields for "main image (header-image)," "title (title)," "article (body)," and "URL (slug).
Click on "Content model" -> "Created content model" and the following screen will appear.
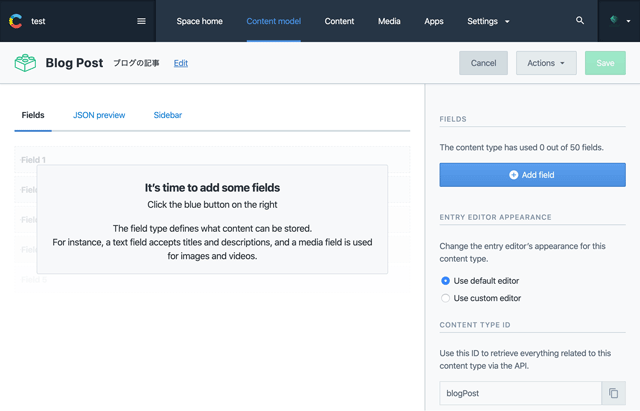
Next, click on the "Add field" button to display the field types, select the appropriate type, and then create the field.
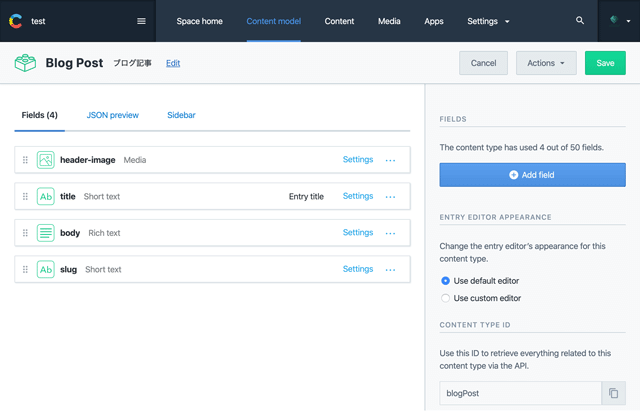
- Main image (header-image) → Type: Media
- Title → Type: Text
- Article (body) → Type: Rich Text
- URL (slug) → Type: Text
Also, press the "Appearance" tab and select "slug".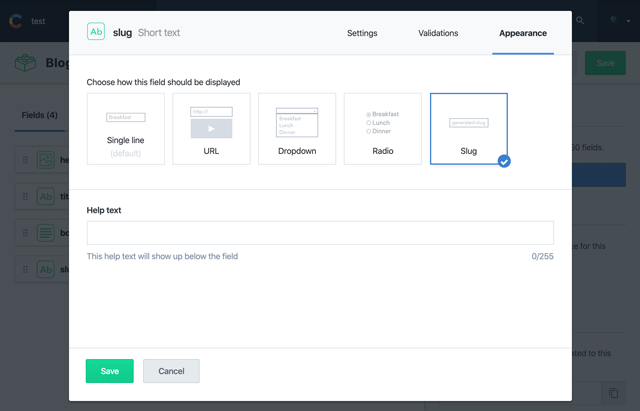

This time we have used minimal field settings, but you can set validation for each field, set the display type like the last field for URLs, and so on, so try adding more fields as you need!
Adding Content (Articles)
Now that the content model and fields have been set up, all that remains is to add more articles.
We will create one article for this project.
Click Content >>Add Blog Post to display the form screen for content.
This form item should show the fields you just set up.
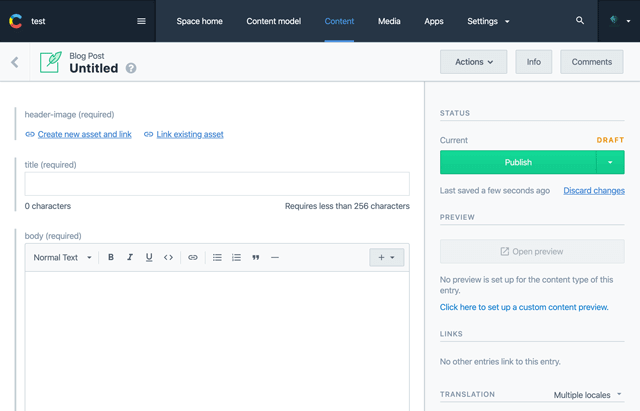
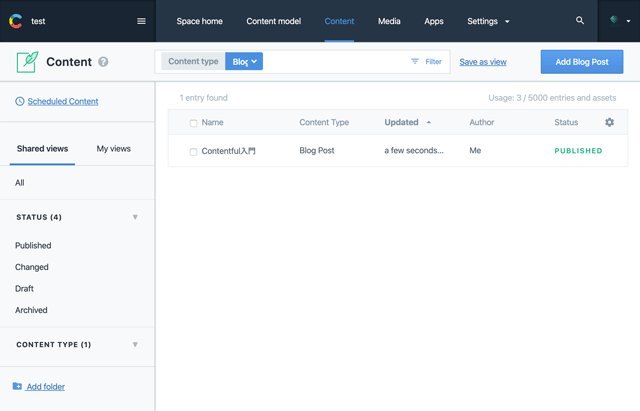
Fill in all the fields, upload any images, click the "Publish" button, and your article is ready to post!
Summary
How was it? That was pretty easy to submit an article!
As I briefly explained, the service is highly customizable, as you can see below!
- You can customize only the elements (fields) for articles that you need.
- Once a space is created, it can be managed separately by project.
- By utilizing the content model, classification can also be done.
- Although I omitted it at this time, it is easy to support multiple languages and very manageable.
However, most people think, "It's great that I created the article, but how do I display it on my Web site?
This is the main difference between WordPress and WordPress: with WordPress, you can review the article on the website at this point.
As described in the previous chapter, Contentful is an API-based CMS.
Therefore, we will use the API provided by Contentful to retrieve the posted articles and display them on the website.
Once you get that far, it's safe to say you've created your own blog!
- References


![[Warp] How to install and use "Warp", the next generation terminal](http://images.ctfassets.net/eebw0y2sorkq/4ySr1PAwyWIdWY0sLJJdF/4e2d274346f57f84561bd239bfb25e88/head-warp.jpg)